Follow our comprehensive guide to effortlessly clean your weed grinder. Our practical tips and techniques will simplify the process, ensuring maximum efficiency without any hassle.
Step 1. Disassemble the Weed Grinder
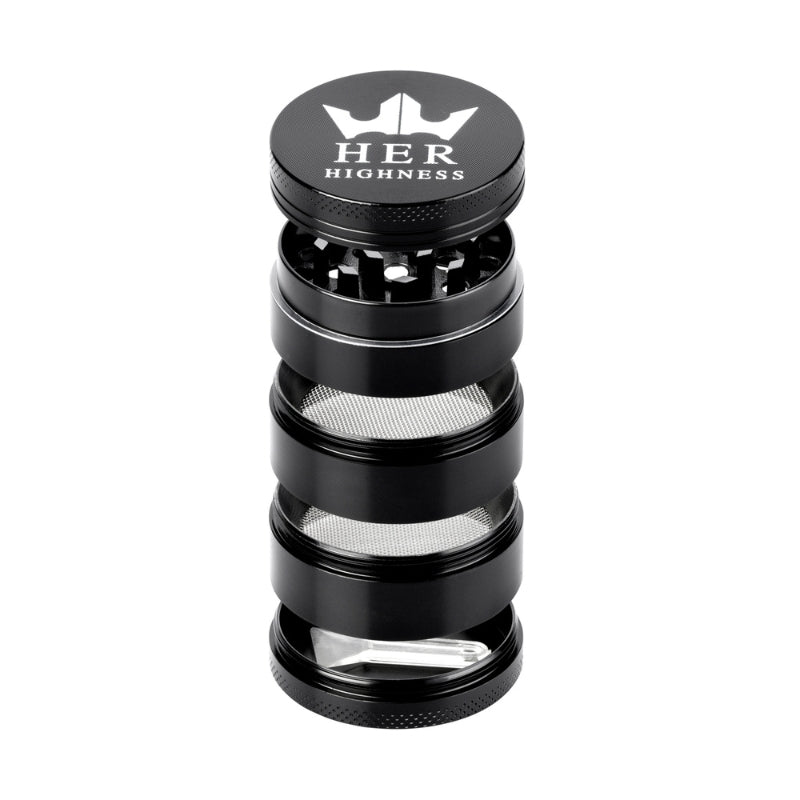
To clean the grinder, simply take it apart. First, unscrew the lid. For two-piece grinders, that's all you need to do. For three-piece grinders, you'll find a top piece, a teeth section, and a bottom piece - just separate the teeth section from the bottom. And if you have a four-piece grinder, it's a bit more involved. Unscrew the teeth section from the screen, and then remove the screen from the bottom piece.
Step 2. Remove Loose Residue and Debris
To clean your grinder, start by tapping the disassembled parts on a clean surface to remove any loose residue. This step is super important because it reduces the amount of cleaning you'll have to do later. Grab a soft brush or an old toothbrush and gently scrub the inside and outside of the grinder to get rid of any remaining residue or debris. If you have it, you can even use compressed air to blow away particles from those tricky corners and teeth.
Step 3. Soak the Components in Isopropyl Alcohol
First, gather all the pieces and put them in a container or bag that can handle isopropyl alcohol. Next, pour some 91% or higher concentration isopropyl alcohol over the parts, ensuring they are fully submerged. Let them soak for 20-30 minutes to dissolve any residue. If necessary, gently stir or shake the components to remove stubborn buildup.
Step 4. Scrub and Clean with Brushes and Picks
After soaking for 20 - 30 minutes, empty the bag and remove your grinder parts. Cleaning your grinder and its parts is a breeze with a clean and dry toothbrush. Simply use the toothbrush to gently scrub away any tough residue on the grinder parts. Don't worry, the bristles are gentle and won't cause any harm. For those tricky nooks and crannies, grab some small brushes or Q-tips for precise cleaning. And for those stubborn spots on the screen, teeth, and corners, just carefully dislodge them with toothpicks or wooden picks without any worries about damaging the grinder.
Step 5. Rinse the Components
Once you're done scrubbing, just rinse the grinder components with water to get rid of any alcohol or residue. This is important to keep the flavour and quality of the herb intact. Simply hold each part under running water and make sure to rinse every surface thoroughly. The water will wash away any residue or cleaning agents that might have loosened up. While rinsing, take a close look at all the components to make sure there's no residue or agents left, especially in areas where buildup usually happens, like the teeth and screen.
Step 6. Dry the Components
To keep the grinder in good condition and avoid rust or damage, make sure to dry each part completely. Use a soft cloth or paper towels to gently pat the surfaces dry. Press the cloth against both the inside and outside to absorb any remaining moisture. If you can, let the parts air dry in a well-ventilated area. Put them on a clean, dry surface with good air flow to let any remaining moisture evaporate.
To tackle those tricky spots, like tight crevices and teeth, try using compressed air to blast away any pesky moisture. Once everything is nice and dry, give all the parts a good once-over, paying extra attention to areas that are likely to get wet, such as teeth and screens.
Step 7. Reassemble the Weed Grinder
Put the grinder back together, making sure everything fits snugly. Don't force anything too hard to avoid any potential damage. Begin by placing the bottom part on a flat surface, with the opening facing upwards. For four-piece grinders, add the screen and make sure it fits correctly. Align the teeth section with the grooves or threads on the bottom piece and gently screw it in. If your grinder has a lid, line it up with the grooves or threads and twist it on securely.
Step 8. Perform a Test Grind
Give the grinder a test run before using it. Put in a bit of herb, close the lid, and rotate smoothly. Keep an ear out for any weird sounds or resistance. The herb should be evenly ground without any big chunks. After that, check inside the grinder for any leftover debris or residue. If needed, give it a good clean to get rid of any remaining particles.
By following these steps, you can easily clean your weed grinder, ensuring its optimal performance and longevity.


